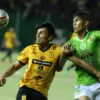
Consadole Sapporo vs Sanfrecce Hiroshima Events
1. Half
 10’S. Sarachat33’Seiya Baba
Foul
44’T. Kawamura (Assist: M. Ohara)

2. Half
46’T. Kondo (Assist: Y. Kobayashi)46’N. Arai (Assist: S. Koshimichi)
50’S. Nakano (Assist: Y. Ohashi)
54’Daihachi OkamuraFoul
65’R. Aoki (Assist: R. Takao)71’S. Sarachat (Assist: T. Hasegawa)71’S. Baba (Assist: T. Nakamura)84’M. Mitsuta (Assist: A. Inoue)
88’D. Okamura (Assist: K. Tanaka)Consadole Sapporo vs Sanfrecce Hiroshima Lineups
Consadole Sapporo
Formation: 3-4-2-1
Coach: M. Petrović
Goalkeeper
-
 T. Sugeno
(1)
T. Sugeno
(1)
Defenders
-
S. Baba
(88)
-
D. Okamura
(50)
-
D. Suga
(4)
Midfielders
-
T. Kondo
(33)
-
H. Miyazawa
(10)
-
T. Arano
(27)
-
R. Aoki
(11)
Forwards
-
Y. Asano
(18)
-
S. Sarachat
(19)
-
Y. Komai
(14)
Substitutes
-
Y. Kobayashi
(99)
-
R. Takao
(2)
-
T. Hasegawa
(16)
-
T. Nakamura
(6)
-
K. Tanaka
(37)
-
K. Hara
(35)
-
J. Kodama
(17)
Sanfrecce Hiroshima
Formation: 3-4-2-1
Coach: M. Skibbe
Goalkeeper
-
K. Osako
(1)
Defenders
-
T. Shiotani
(33)
-
S. Nakano
(15)
-
S. Sasaki
(19)
Midfielders
-
N. Arai
(13)
-
T. Matsumoto
(14)
-
T. Kawamura
(8)
-
S. Higashi
(24)
Forwards
-
M. Kato
(51)
-
M. Mitsuta
(11)
-
Y. Ohashi
(77)
Substitutes
-
M. Ohara
(40)
-
S. Koshimichi
(32)
-
A. Inoue
(36)
-
G. Notsuda
(7)
-
G. Kawanami
(22)
-
Y. Nakajima
(35)
-
T. Shichi
(16)
Consadole Sapporo vs Sanfrecce Hiroshima Statistics

Consadole Sapporo

Sanfrecce Hiroshima
2
Shots on Goal6
3
Shots off Goal10
5
Total Shots22
0
Blocked Shots6
4
Shots Inside Box13
1
Shots Outside Box9
12
Fouls9
1
Corner Kicks8
0
Offsides0
51
Ball Possession49
2
Yellow Cards0
0
Red Cards0
5
Goalkeeper Saves1
504
Total Passes482
377
Accurate Passes355
75
Pass Accuracy74
0.66
Expected Goals2.16
0
Goals Prevented0
J1 League 2024 Standings
| POS | Team | Played | Won | Drawn | Lost | Points | GF | GA | GD |
|---|---|---|---|---|---|---|---|---|---|
| 1 |  Vissel Kobe Vissel Kobe | 38 | 21 | 9 | 8 | 72 | 61 | 36 | 25 |
| 2 |  Sanfrecce Hiroshima Sanfrecce Hiroshima | 38 | 19 | 11 | 8 | 68 | 72 | 43 | 29 |
| 3 |  Machida Zelvia Machida Zelvia | 38 | 19 | 9 | 10 | 66 | 54 | 34 | 20 |
| 4 |  Gamba Osaka Gamba Osaka | 38 | 18 | 12 | 8 | 66 | 49 | 35 | 14 |
| 5 |  Kashima Kashima | 38 | 18 | 11 | 9 | 65 | 60 | 41 | 19 |
| 6 |  Tokyo Verdy Tokyo Verdy | 38 | 14 | 14 | 10 | 56 | 51 | 51 | 0 |
| 7 |  FC Tokyo FC Tokyo | 38 | 15 | 9 | 14 | 54 | 53 | 51 | 2 |
| 8 |  Kawasaki Frontale Kawasaki Frontale | 38 | 13 | 13 | 12 | 52 | 66 | 57 | 9 |
| 9 |  Yokohama F. Marinos Yokohama F. Marinos | 38 | 15 | 7 | 16 | 52 | 61 | 62 | -1 |
| 10 |  Cerezo Osaka Cerezo Osaka | 38 | 13 | 13 | 12 | 52 | 43 | 48 | -5 |
| 11 |  Nagoya Grampus Nagoya Grampus | 38 | 15 | 5 | 18 | 50 | 44 | 47 | -3 |
| 12 |  Avispa Fukuoka Avispa Fukuoka | 38 | 12 | 14 | 12 | 50 | 33 | 38 | -5 |
| 13 |  Urawa Urawa | 38 | 12 | 12 | 14 | 48 | 49 | 45 | 4 |
| 14 |  Kyoto Sanga Kyoto Sanga | 38 | 12 | 11 | 15 | 47 | 43 | 55 | -12 |
| 15 |  Shonan Bellmare Shonan Bellmare | 38 | 12 | 9 | 17 | 45 | 53 | 58 | -5 |
| 16 |  Albirex Niigata Albirex Niigata | 38 | 10 | 12 | 16 | 42 | 44 | 59 | -15 |
| 17 |  Kashiwa Reysol Kashiwa Reysol | 38 | 9 | 14 | 15 | 41 | 39 | 51 | -12 |
| 18 |  Jubilo Iwata Jubilo Iwata | 38 | 10 | 8 | 20 | 38 | 47 | 68 | -21 |
| 19 |  Consadole Sapporo Consadole Sapporo | 38 | 9 | 10 | 19 | 37 | 43 | 66 | -23 |
| 20 |  Sagan Tosu Sagan Tosu | 38 | 10 | 5 | 23 | 35 | 48 | 68 | -20 |
No head-to-head data available for these teams.
Consadole Sapporo vs Sanfrecce Hiroshima Predictions
Consadole Sapporo
10%
Draw
45%
Sanfrecce Hiroshima
45%
Win or draw
Double chance : draw or Sanfrecce Hiroshima